
How to connect databricks-connect with your workspace (incl. Serverless Compute)
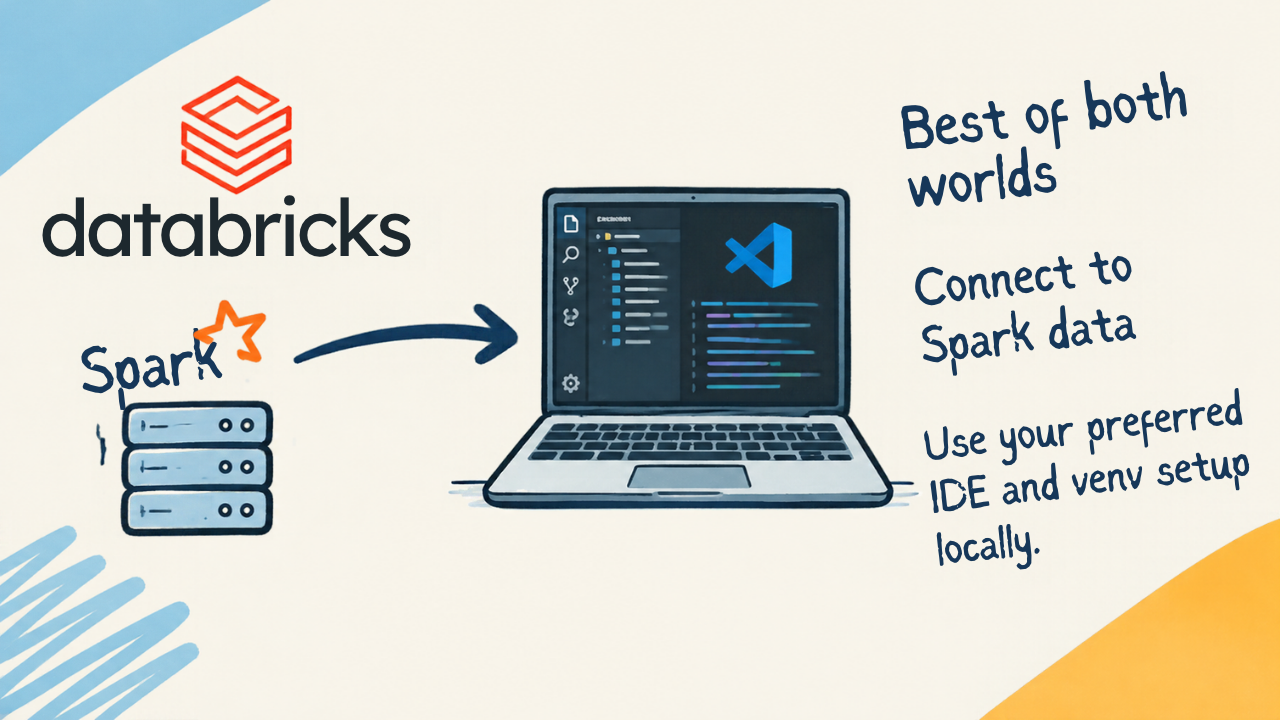
Now that Databricks has introduced a free tier, allow me to show you how best to code with Databricks in your ML projects (in my opinion).
Databricks Connect allows you to benefit from the best of both worlds: your local IDE and Python environment system AND Databricks online databases with up-to-date data, Spark clusters for working with large tables using distributed compute clusters.
ML folder
Go into any of your Machine Learning models that you want to connect to any of the Databricks compute clusters or access Databricks tables from.
Databricks CLI
While you can do a lot by just installing the Databricks Extension in VSCode or Pycharm etc, I recommend getting to use the Databricks CLI in the terminal. You will definitely need it once you want to work with scheduled jobs and workflows and get to deployment. It also makes you independent from a specific extension and you can access Databricks even from just the terminal.
# Install via Homebrew on MacOS and Linux:
brew tap databricks/tap
brew install databricks
If you are on Mac or Linux, my favorite way to install most utilities is Homebrew (https://brew.sh/). It allows you to install a looot of software engineering tools with just one or two commands these days. If you are on Windows, just get WSL (https://learn.microsoft.com/en-us/windows/wsl/install) and then you follow the instructions for Linux including Homebrew. 😅
Here is the official documentation with some alternative installation instructions: https://docs.databricks.com/aws/en/dev-tools/cli/install
Authenticate with Databricks & .databrickscfg
Authenticate via OAuth
The easiest way, in my opinion, to connect with your Databricks workspace is OAuth.
Just type in:
databricks auth login
It will ask you for a profile name (so you could manage multiple different Databricks workspaces). Just type in "personal" or "DEFAULT", if you have no other Databricks connections or want this as your primary connection, or something else like your company name to help you remember which Databricks instance this is for.
It will then ask for the URL to your Databricks instance:
Databricks host (e.g. https://<databricks-instance>.cloud.databricks.com):
If you are using Azure, the URL could be slightly different, ending on .azuredatabricks.net/ for example. Regardless, this URL is always what you see in your browser when you are logged in to your Databricks account:

And then this should open a browser window for you to login as usual or simply show you:

Done ✅
.databrickscfg File
After you initially configured a connection or created a profile like above, it should have created a .databrickscfg file for you. This should be in your home directory (often referred to as ~) and you can view it at ~/.databrickscfg. On MacOS that's /Users/your-username/.databrickscfg on Linux /home/your-username/.databrickscfg.
It should look something like this:
; The profile defined in the DEFAULT section is to be used as a fallback when no profile is explicitly specified.
[DEFAULT]
[personal]
host      = https://<databricks-instance>.cloud.databricks.com/
auth_type = databricks-cli
Alternative: Authenticate via the Personal Access Token
If you OAuth doesn't work for some reason, you can use a Personal Access Token (short: PAT) instead.
You can use the command databricks configure:

This will update your .databrickscfg file accordingly.
By default, this will change the connection under [DEFAULT]. If you don't want that, use databricks configure --profile "<your-new-profile-name-for-this-connection>".
You can also just change the .databricks.cfg yourself:
[newconnection]
host  = https://<your-databricks-instance>.cloud.databricks.com
token = <your-PAT>
Sometimes I find this easier and you can make sure that you have configured everything to your liking.
Connect your project with a Databricks compute & databricks.yml
So far we have connected your personal machine (laptop, PC, whatever) with the Databricks server. This applies to all your projects and is done in a global Databricks configuration file as shown above.
Now we still need to connect your specific ML project to a specific type and instance of compute on Databricks. Essentially, this consists of x steps:
- Create a
databricks.ymlfile either manually or by clicking through dialogs in your extension - Choose a compute (either a cluster or select serverless)
- Create a virtual environment that matches the Python version of the selected compute
- Activate the virtual environment and install
databricks-connectinside that environment
Let's go through these steps:
Databricks IDE Extension (shown here for VSCode)
It's slightly easier to see and debug this for your first setup if you use an extension like the VSCode Extension:

There's also an extension for PyCharm and some other editors, but it looks like the one for VSCode (and forks, it also works on Antigravity and similar AI editors that are based on VSCode) is best maintained.
This first time you open it before you ever create a databricks.yml file, it will look like this:

If you already opened the ML project that you want to connect with Databricks, select the first option: "Create configuration". This should create the databricks.yml file in your root folder.
It will prompt you to select a host again. You get a dropdown menu with all different hosts that you have provided in the .databrickscfg earlier:

Next, the dialog will prompt you to select one of the connections we previously created:

After that, the extension should look something like this:

Don't worry if the AI Tools aren't available yet, they're not needed for this setup.
Resulting databricks.yml file
Going through this dialog above should have created a databricks.yml file in your root project folder:
bundle:
  name: HotelReservation_MLflow
targets:
  dev:
    mode: development
    default: true
    workspace:
      host: https://dbc-cdb0b7e3-983d.cloud.databricks.com
Select a cluster or serverless
If you have a Databricks instance with all-purpose compute clusters available, they should be available as a drop-down menu, where it says "Serverless" in my screenshot.

You should be able to unfold this section to see detail about the cluster and next to the cluster name, you can switch to another cluster and start/stop it.
If you are using the Databricks Free Version or only have serverless compute, you should see something similar to my screenshot.
Python environment
As you can see in the above screenshot, the extension currently can't detect a Python environment and offers you a walkthrough to set one up.

In my case, with current (November 2026) serverless compute, it's on version v5, which requires Python 3.12. You can find more information about matching Python versions at https://docs.databricks.com/aws/en/dev-tools/databricks-connect/requirements#databricks-connect-versions.
However, you can follow the wizard for the full setup:

If you only want the correct Python version, select the last entry called "Python setup". This updates your pyproject.toml if necessary and creates a new .venv via uv. However, I recommend to also install databricks-connect, so choose the first or second option.
Install databricks-connect
Inside your now created virtual environment, you need to have the databricks-connect Python library.
It's available via PyPI, so you COULD install it via
pip install databricks-connect
However, the version number is important here as well (it needs to match the Databricks Cluster version), so following the wizard automates that for you.
If you select "DB Connect setup" in the "Setup Python environment" wizard, it adds the right version to your pyproject.toml as a dev-dependency:
[dependency-groups]
dev = [
    "pytest>=9.1.1",
    "databricks-connect~=18.2.0",
]
Note: You can optionally do the "Full environment setup", which will add a bunch of constraints based on the Databricks Runtime on the cluster to your pyproject.toml. I've never needed it so far and you can always add it later by just refreshing the Python environment via the Wizard if you do end up needing this. 🤷🏻♀️
You specifically want this as a dev-dependency, not a full dependency, because you can't use databricks-connect ON Databricks. So when you deploy your code to Databricks as a job, you don't want this library in your deployment.
Afterwards you should see an updated info about the Python environment being ready in the Databricks extension:

If you have a checkmark next to "Python environment", you did it correctly.
Execute some Pyspark code via DatabricksSession
Here's some example code that creates a DatabricksSession for remotely connecting to Databricks. If you run the same code on the server directly (for example in Notebook), it will use the SparkSession instead.
from pyspark.sql import SparkSession
try:
    from databricks.connect import DatabricksSession
    spark = DatabricksSession.builder.getOrCreate()
    # if you have a specific auth profile in your .databrickscfg and/or use serverless, add .profile() and .serverless():
    # spark = DatabricksSession.builder.profile("sg-free").serverless().getOrCreate()
except ImportError:
    spark = SparkSession.builder.getOrCreate()
# Create example DataFrame
data = [("Alice", 25), ("Bob", 30), ("Charlie", 35)]
columns = ["name", "age"]
df = spark.createDataFrame(data, columns)
# Save DataFrame to a Databricks table
table_name = "dev.default.test_table"
df.write.mode("overwrite").saveAsTable(table_name)
# Read the table back
df_read = spark.table(table_name)
df_read.show()
You can just run the code in your virtual environment now:
uv run your_script.py
# or (make sure you are in the venv)
python your_script.py
Alternatively, the VSCode extension comes with a button:

The first option is "Run File as Workflow", which uploads the whole file to Databricks and runs it there. That's not really what databricks-connect is great for. The last option is roughly equivalent to the above uv run your_script.py command. Personally, I just use the terminal to make sure I run it the way I intended.
This will run any code locally that doesn't rely on the Spark Session. Only Spark code is executed using the DatabricksSession and the connected Compute. This gives you complete control over the installed (ML) packages in your environment without having to install them on your Compute every session.
Special requirements and code adjustments for serverless
If you are using serverless compute, you need to add serverless() to the DatabricksSession builder:
from databricks.connect import DatabricksSession
spark = DatabricksSession.builder.serverless().getOrCreate()
Make sure you have databricks-connect installed in version 15.1 or higher for serverless to work.
No spam, no sharing to third party. Only you and me.
Member discussion